I recently had my first go with the Processing programming language. Inspired by J David Eisenberg's tutorial on Anatomy of a Program, I will explain here how I got started with Processing.
To give an idea of what all this work is about, have a look at a video of the output (generating which is also a part of the program). I had asked a bunch of my friends (we call ourselves the Pikeys) about how much it cost them to live in their cities. I made this video for both the purpose of learning Processing, as well as to see the information myself:
Now instead of simply explaining the final code, I will try to explain the various steps the program went through, including some crummy parts which other tutorials generally skip. I had zero (rather negative) experience with programming graphics myself (in C/C++) and had more or less given up on it before trying out Processing. Also, I do not consider myself a designer per se. Hence, I probably bumped a lot more often into problems which perhaps only a newbie would appreciate. That is exactly who I would like to help!
Initial Idea
After seeing the FireCube example and the rotating world map, I knew that their was exactly what I wanted: A flame on each city with the intensity of the flames indicating how big a hole living there would burn in your pocket. Now all I had to do was somehow do it.
After putting off the execution for about a month, I finally started with the project in the earnest with this:
Yes, that's right: a good 640 x 480 sized screen. That's a start.
Also, the first lines I code I wrote are expressible in less than 140 characters. All the screen shots which follow were taken by just pressing 's' while the program was running. Since my efforts continued for more than just one day, I augmented the trick a little:
Adding day, month and year details too.
Finding a world map.
Of course, the most obvious place to look at is Wikimedia's blank map page. I found a blank map which suited me and a couple of lines later, the map was there:
It was a little out of place, because of some transparent border which Wikipedia had added to the png, and a little off size too. However, cropping the bottom (sorry Antarctica) using Gimp and figuring out resizing options in image() was the easy part.
I knew at this point that the I would probably need to resize my canvas (not the image) depending on the end result. Hence, to locate the cities, I decided to go with the relative co-ordinates, which would be multiplied with the width/height of the canvas to get the (x,y) co-ordinates:
Then getting the location of the cities was as easy as clicking on the approximate location of the city on the map. Also, as I knew the cost of living in the city (I had some of my friends answer this survey), I made a linear interpolation between the green and red depending on the city costs and plotting ellipses at those points, I ended up with this (blue tint added to make the colors stand out):
Rotating the map
Now begins the fun part. So far, I did not particularly need Processing to do the task, I might as well have done it with Gimp. However, I wanted to get some action in. The easiest way to go about it seemed to me to include the P3D option in the call to size() function and then rotating the camera around.
size(800, 480, P3D);
...
...
However, the results were a little off:
I realized that calling smooth() in setup() was necessary to get the cities in the right places:
However, there still were two issues here:
Making the flames
I continued with trying to make flames. The first steps were converting the 2D animation of Firecube example to 3D. More about the conversion some other time, but it was not a very difficult. However, the end result was not as I had hoped:
The intensity of the flames at the bottom was decided by the cost of living in the city and the flame was drawn pixel by pixel. Also, it was incredibly slow. So I instead decided to draw flames using ellipses myself. For each frame, I was drawing ellipses with center at the city, with some noise added. For each ellipse in the z-directino, I was reducing the radius and increasing the transparency to give a fade-out effect. The height was also proportional to the cost of living in the city.
There were a few problems here:
Getting the video output
It turned out to be much easier than I had thought, thanks to the abundant processing libraries. Though I suppose it is possible just as easily using the bundled Video library, I decided to go with the GSvideo, which offered the same interface with a much wider codec range (including ogg). After initializing the object, adding support for recording was incredibly simple:
void keyPressed() {
Final words
Of course, there were many other 'fix-this-and-that' moments during the code writing which I have not document here. Changing a color here, checking out different coloring schemes there, adjusting sizes of things, resizing the image to death, etc. are a few of these examples. I had to set the line somewhere.
Also, I have avoided talking as much as I could about the code, which is here. I hope, nevertheless, that I succeeded in giving an impression of how the development of the idea went, from a blank grey screen to a 3D world map set on motley flames. Also, I hope that I made it sound easy, because it really is!
Overall, I was satisfied with the project and I intend to return to Processing to do more serious visualizations soon. I hope you do too!
~
musically_ut
To give an idea of what all this work is about, have a look at a video of the output (generating which is also a part of the program). I had asked a bunch of my friends (we call ourselves the Pikeys) about how much it cost them to live in their cities. I made this video for both the purpose of learning Processing, as well as to see the information myself:
Now instead of simply explaining the final code, I will try to explain the various steps the program went through, including some crummy parts which other tutorials generally skip. I had zero (rather negative) experience with programming graphics myself (in C/C++) and had more or less given up on it before trying out Processing. Also, I do not consider myself a designer per se. Hence, I probably bumped a lot more often into problems which perhaps only a newbie would appreciate. That is exactly who I would like to help!
Initial Idea
After seeing the FireCube example and the rotating world map, I knew that their was exactly what I wanted: A flame on each city with the intensity of the flames indicating how big a hole living there would burn in your pocket. Now all I had to do was somehow do it.
After putting off the execution for about a month, I finally started with the project in the earnest with this:
 |
| Was not sure how to say hello world. |
Yes, that's right: a good 640 x 480 sized screen. That's a start.
Also, the first lines I code I wrote are expressible in less than 140 characters. All the screen shots which follow were taken by just pressing 's' while the program was running. Since my efforts continued for more than just one day, I augmented the trick a little:
void keyPressed() {if (key == 's')save( "screen_shots/" +year() + "_" +month() + "_" +day() + "_" +hour() + "_" +minute() + "_" +second() + ".png");}
Adding day, month and year details too.
Finding a world map.
Of course, the most obvious place to look at is Wikimedia's blank map page. I found a blank map which suited me and a couple of lines later, the map was there:
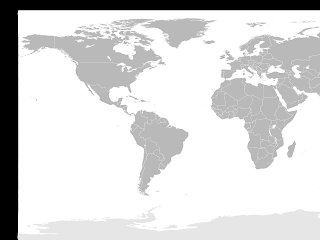 |
| World Map |
I knew at this point that the I would probably need to resize my canvas (not the image) depending on the end result. Hence, to locate the cities, I decided to go with the relative co-ordinates, which would be multiplied with the width/height of the canvas to get the (x,y) co-ordinates:
void mousePressed() {println("(" + mouseX/float(width) + "," + mouseY/float(height) + ")");}
Then getting the location of the cities was as easy as clicking on the approximate location of the city on the map. Also, as I knew the cost of living in the city (I had some of my friends answer this survey), I made a linear interpolation between the green and red depending on the city costs and plotting ellipses at those points, I ended up with this (blue tint added to make the colors stand out):
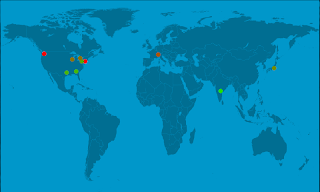 |
| Cities with approximate cost of living in them |
Rotating the map
Now begins the fun part. So far, I did not particularly need Processing to do the task, I might as well have done it with Gimp. However, I wanted to get some action in. The easiest way to go about it seemed to me to include the P3D option in the call to size() function and then rotating the camera around.
size(800, 480, P3D);
...
...
float center_x = width/2;float center_y = height/2;float center_z = 0.0;float eye_x = 400 * cos(angle * PI / 180) + center_x;float eye_y = 400 * sin(angle * PI / 180) + center_y;float eye_z = 200.0;camera(eye_x, eye_y, eye_z,center_x, center_y, center_z,0.0, 1.0, 0.0); // upX, upY, upZ
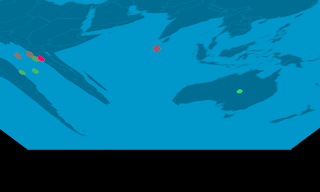 |
| Image rotation with P3D |
I realized that calling smooth() in setup() was necessary to get the cities in the right places:
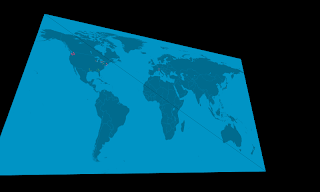 |
| World map with smooth() and P3D |
However, there still were two issues here:
- There was diagonal line right across the image
- The ellipses kept flickering (As this is only a snap-shot, the flickering is not clear, but it is easy to perceive that the ellipses were only partially visible)
- The rotation was not at all like I had imagined.
- Using OPENGL instead of P3D (due to some bugs in processing)
- Drawing the ellipses 'one' pixel above the image in the z-direction.
- To orient the rotation correctly, I had to set the camera direction up direction to (0.0, 0.0, -1.0).
That fixed the graphics issues at least.
Making the flames
I continued with trying to make flames. The first steps were converting the 2D animation of Firecube example to 3D. More about the conversion some other time, but it was not a very difficult. However, the end result was not as I had hoped:
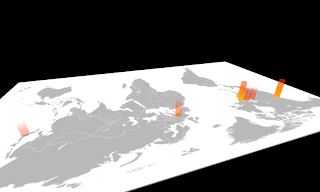 |
| Flames on the world map |
 |
| Wobbling ellipses which faded out to give the impression of a flame |
There were a few problems here:
- The random ellipses did not look like flames at all. They looked like wobbling tower of hanoi instead.
- The transparent ellipses drawn in the front made the back ground image visible instead of the flame (see the green flame over Texas and Madison).
Fixing the first issue (is it a bug?) simply required minimizing the overlap among flames. :-)
To fix the second issue, I started making the ellipses slide up preserving their centers and fading out, instead of giving them a wobbling effect, changing their centers. Though this is not visible in the snapshots, the final effect looks much more like smoke rising from the flames:
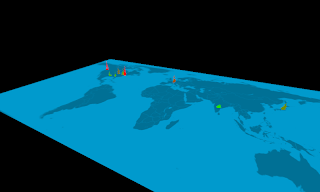 |
| Final version |
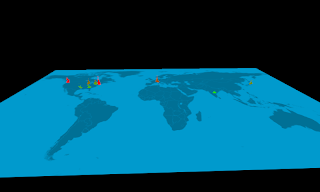 |
| Final version |
It turned out to be much easier than I had thought, thanks to the abundant processing libraries. Though I suppose it is possible just as easily using the bundled Video library, I decided to go with the GSvideo, which offered the same interface with a much wider codec range (including ogg). After initializing the object, adding support for recording was incredibly simple:
// Learnt this trick from @blprnt, save a screen shot when 's' key is pressed.if (key == 's')save( "screen_shots/" +year() + "_" +month() + "_" +day() + "_" +hour() + "_" +minute() + "_" +second() + ".png");if(key == ' ' && !recording) {String video_file_name = "videos/" + year() + "_" + month() + "_" + day() + "_" + hour() + "_" + minute() + "_" + second() + ".avi";// Save as XVID in a AVI file with BEST quality:mm = new GSMovieMaker(this, width, height, video_file_name, GSMovieMaker.XVID, GSMovieMaker.BEST, fps);mm.start();recording = true;} else if (key == ' ' && recording) {mm.finish();exit();}}
That's it!void draw(){....if(recording) {loadPixels();mm.addFrame(pixels);}}
Final words
Of course, there were many other 'fix-this-and-that' moments during the code writing which I have not document here. Changing a color here, checking out different coloring schemes there, adjusting sizes of things, resizing the image to death, etc. are a few of these examples. I had to set the line somewhere.
Also, I have avoided talking as much as I could about the code, which is here. I hope, nevertheless, that I succeeded in giving an impression of how the development of the idea went, from a blank grey screen to a 3D world map set on motley flames. Also, I hope that I made it sound easy, because it really is!
Overall, I was satisfied with the project and I intend to return to Processing to do more serious visualizations soon. I hope you do too!
~
musically_ut

2 comments:
Is it possible to map city with their longitude and latitude value?
If not, do you know about any other such tool?
To do it for arbitrary latitude and longitudes for the kind of map that I had, I would use Mercator projections.
Hope that solves your problem as well.
~
ut
Post a Comment